By default Kademi gives you a signup page for each user Group which is open or has administrator review. But often you will want to make your own registration form:
- to have a single form which allows selecting the group
- to optimise screen layout
- implement custom validation logic, etc
Which file to edit?
If you want to stick with the default signup page per group, then you can override the default registration page template.
But you can also create a new html page at any location. As long as the form posts to the correct location (using ajax) the result is the same.
Which URL to POST to, ie what form action to use
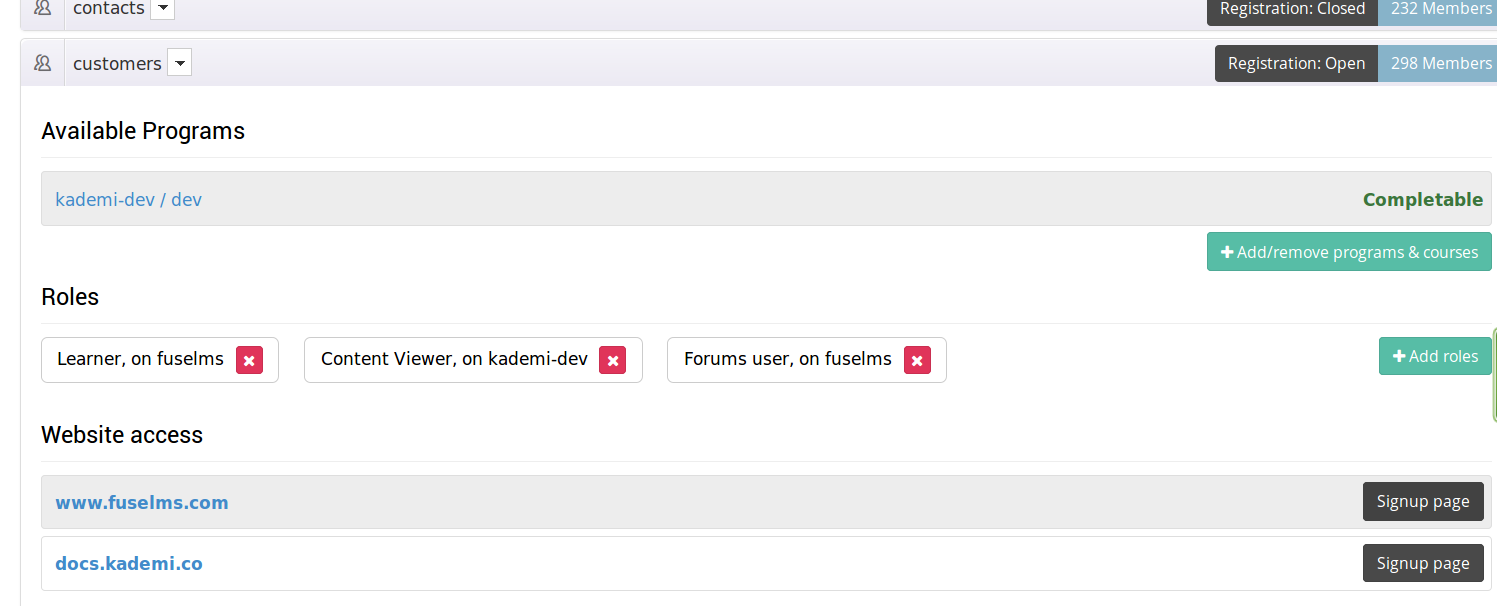
The registration form must be posted to the url for the group the user is registering to, eg /signup/Learners or /signup/Staff, etc. You can find these URLs from the manage groups page, from the "Signup page" button:
If you want to allow your users to choose which group to join, then you will need some javascript to change the form action.
Choosing an organisation
You may want your users to select an organisation unit when registering. For example, if your users are retail staff and you have a database of stores, you might want them to select a store. That list might be short, so you can just use a select box, or you might have thousands of stores so you need users to search for their organisation.
Kademi supports both options. You can list organisations with a #foreach loop to generate select options, or you can use twitter type ahead
The form html
Here is some example template html code, an explanation is below:
And the corresponding javascript:
$(document).ready(function() {
    initRegister("/dashboard");
});

function initRegister(afterRegisterHref) {
    log("init labels")
    var form = $("#registerForm");
    var lastTabIndex = 0;
    jQuery("#registerForm label.collapse").each(function(i, n) {
        var label = jQuery(n);
        var title = label.text();
        var input = form.find("#" + label.attr("for"));
        input.attr("title", title);
        input.attr("tabindex", i + 1);
        log("set tab index", input, i + 1);
        label.text(i + 1);
        lastTabIndex = i + 2;
    });
    form.find("button[type=submit]").attr("tabindex", lastTabIndex);
    initRegisterForms(afterRegisterHref);
}

function initRegisterForms(afterRegisterHref, callback) {
    log("initRegisterForms - bootstrap300", jQuery("#registerForm"));
    $("#registerForm").forms({
        validationFailedMessage: "Please enter your details below.",
        callback: function(resp, form) {
            if (resp.messages && resp.messages[0] == "pending") {
                showPendingMessage();
            } else {
                log("created account ok, logging in...", resp, form);
                var userName = form.find("input[name=email]").val();
                var password = form.find("input[name=password]").val();
                doLogin(userName, password, {
                    afterLoginUrl: afterRegisterHref,
                    urlSuffix: "/.dologin",
                    loginCallback: callback
                }, this);
            }
        }
    });

    $.getScript("/static/typeahead/0.10.2/typeahead.bundle.js", function() {
        $.getScript("/static/handlebars/1.2.0/handlebars.js", function() {
            try {
                var searchUrl = $("#registerForm").attr("action");

                var orgs = new Bloodhound({
                    datumTokenizer: Bloodhound.tokenizers.obj.whitespace('value'),
                    queryTokenizer: Bloodhound.tokenizers.whitespace,
                    remote: {
                        url: searchUrl + '?jsonQuery=%QUERY&th',
                        replace: function() {
                            return $("#registerForm").attr("action") + '?jsonQuery=' + encodeURIComponent($("#orgName").val()) + '&th';
                        }
                    }
                });

                orgs.initialize();

                $("#orgName").typeahead(null, {
                    minLength: 1,
                    valueKey: "title",
                    name: "orgs",
                    source: orgs.ttAdapter(),
                    templates: {
                        empty: [
                            '
' ].join('\n'), suggestion: Handlebars.compile('
{{title}} {{address}}, {{postcode}}
') } }); $("#orgName").on("typeahead:selected", function(e, datum) { log("Selected", e, datum); $("#orgId").val(datum.orgId); }); flog("init typeahead3"); } catch (e) { flog("exception: " + e); } }); }); function showPendingMessage() { showModal($("#pending")); } }
Identifying the group through the form action
A registration form always creates a registration to a specified user group. You specify the group by setting the form action attribute, where the action is the group name followed by '/signup'. Eg for a group called "retail-staff" the form would be like this:
This causes the form to be POST'ed to the url /retail-staff/signup. Also, any organisation lookup queries are sent to that url and only options valid for that group are returned.
Form ajax handling with jquery.forms
The server side handler is designed for use with ajax submissions, because it returns json data indicating status and any validation errors. So you must use ajax to POST.
You can submit the ajax POST request by any means, but the default and recommended approach is to use an inline form and initialise it with the Kademi jquery.forms plugin. This will intercept the submit event, apply validation rules and, if valid, serialise form inputs and send them to the server in an ajax request. Any validation errors in the response are mapped to the inputs in the form and displayed appropriately.
Initialising the forms plugin is simple:
$("#registerForm").forms({
    // callback and other options go here
})
The plugin has options for functions which
- add additional validation prior to submit
- successful registration,
- handling errors
Please see the kademi jquery forms plugin source file for more details (please check the version that you're using)
Form inputs
The registration form has certain inputs which have special meaning and must have specified input names
- email - the email address to register with
- nickName - the display name for this user, ie visible to other users in comments etc
- password - the password to create. If a confirmPassword input is present the default form handling will verify they match, but its not required for server processing
- orgId - the unique ID of the organisation to register to. If empty defaults to your account organisation. This is normally a hidden input because users will search for their company by typing in its name and/or address. The default form uses twitter typeahead to show search results as the user types. You can also use a select box which simply lists all available organisations, and in some cases it will make sense to require your users to enter a code for their organisation.
Additionall you can have inputs for any custom fields defined by the group
Organisation search
You can get a list of organsiations as JSON by sending a GET request to the group signup url (see section above) with the following parameters:
- jsonQuery - this is the value to search for, and indicates results must be in JSON
- th - return results optimised for twitter typeahead. The parameter has no value.
- where-X - apply a field, only returning organisations where the field X has the given value
Example - find organisations matching 'cal', which have a brand field of Petbarn, and return results optimised for twitter typeahead
http://www.pet-ed.com.au/ps/signup?jsonQuery=cal&where-brand=Petbarn&th
Which returns this:
[
    {
        "address": "2 Sydal Street",
        "postcode": "4551",
        "addressState": "Queensland",
        "title": "Petbarn - Caloundra",
        "hasPrimaryMembers": true,
        "orgId": "0019000000KoWcQAAV",
        "phone": "07 31813203",
        "addressLine2": "CALOUNDRA",
        "tokens": [],
        "id": 19567350,
        "state": "Queensland",
        "fields": {
            "brand": "Petbarn"},
        "value": "0019000000KoWcQAAV"
    },
    {
        "address": "Cnr Georgia Cres & Callanan Rd",
        "postcode": "830",
        "addressState": "Northern Territory",
        "title": "Petbarn - Yarrawonga.",
        "hasPrimaryMembers": true,
        "orgId": "0019000000KoNCGAA3",
        "phone": "08 8931 1085",
        "addressLine2": "Yarrawonga",
        "tokens": [],
        "id": 19570301,
        "state": "Northern Territory",
        "fields": {"brand": "Petbarn"},
        "value": "0019000000KoNCGAA3"
    }
]
Using opt-in groups
Often you will want your users to be able to choose to register to additional groups, ie to "opt-in" to mailing lists.
To do that:
- Create a group for the opt-in in the Manage Groups page, ie "promotions"
- Go to the settings for the primary group, and add that group as an opt-in
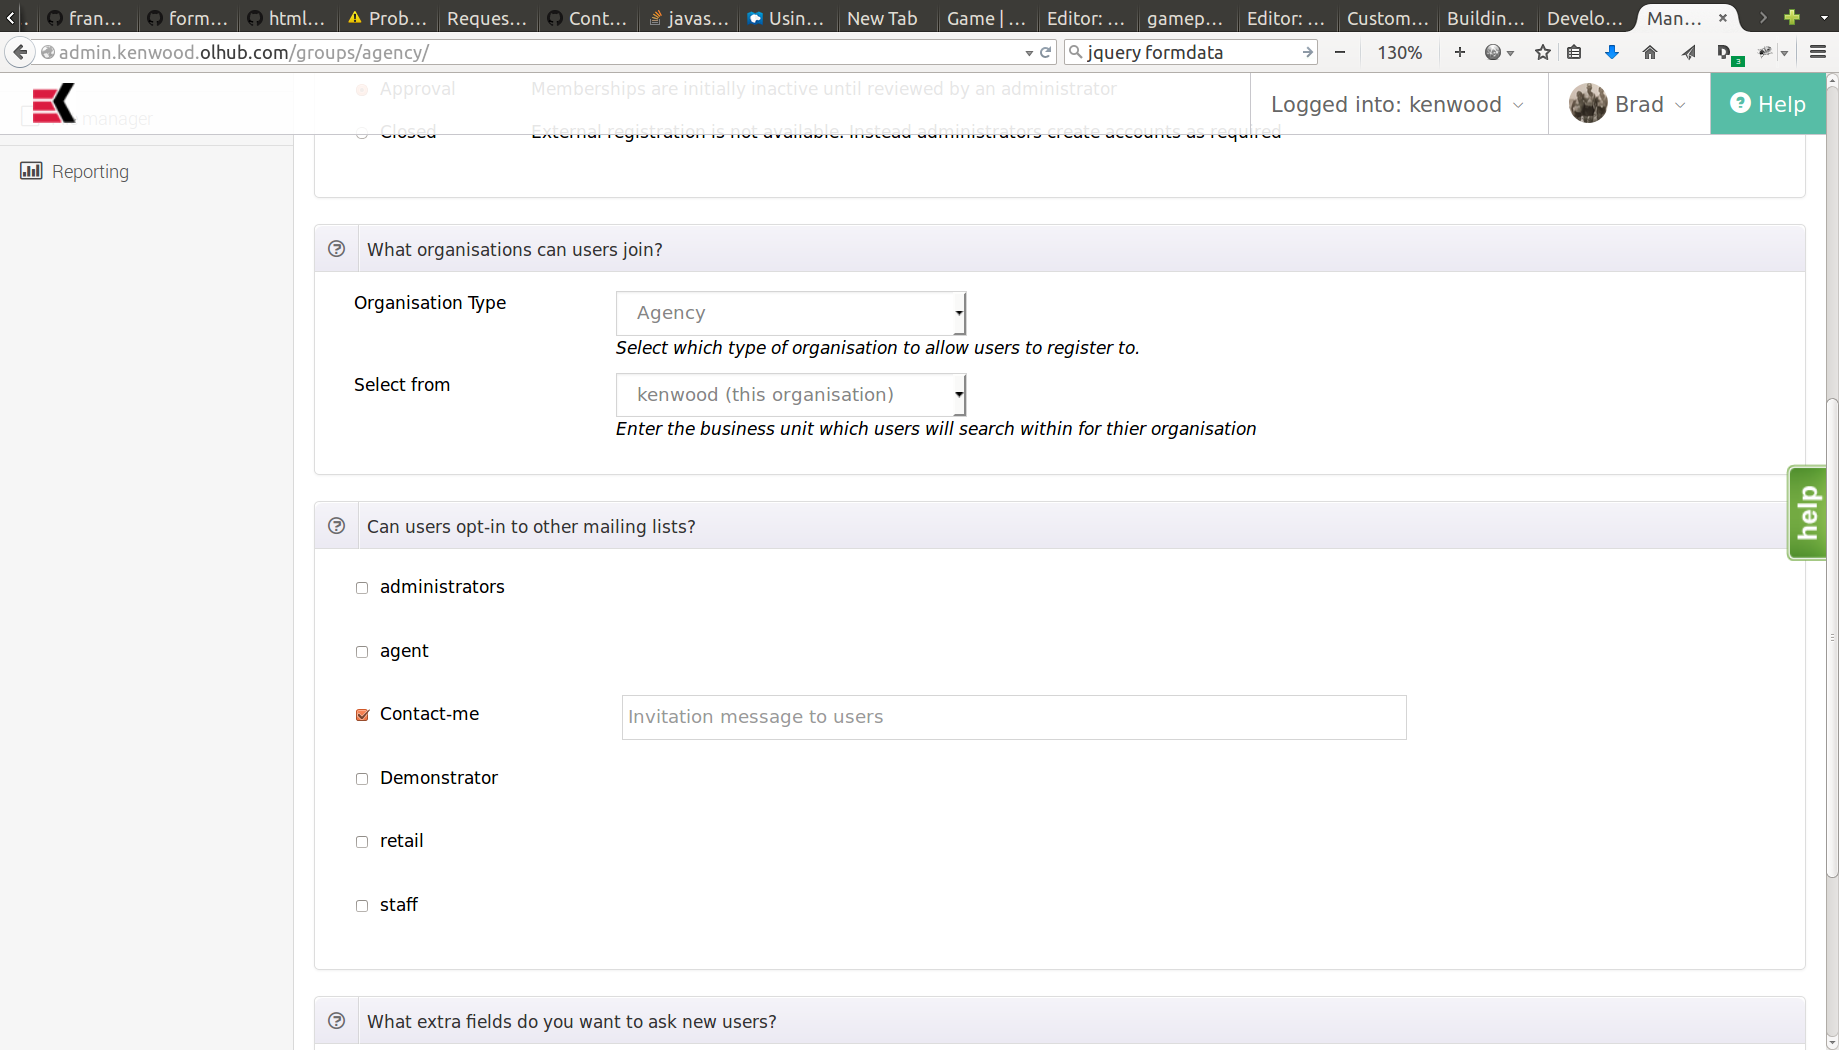
- On the registration form, add a checkbox with name="optins" with value="promotions" (or whatever you called your optin group)
Now when the user selects the checkbox and submits the form the user will be added to the "promotions" group. They user will have the option the unsubscribe from that group on their profile page