Kademi has an extensive set of reports in the Reporting section. But often you will need to produce custom reports to format your data in a form suitable for your client and/or business application.
The reporting framework provides information visually in the form of trend graphs and histograms, and detailed information through CSV and spreadsheet exports.
There are a few different ways to achieve that which are described below with examples:
- Create completely new CSV files which generate content from a template
- Customise existing reports, which allows you to customise the fields in exported CSV files using expressions
- Create a custom application with completely bespoke and interactive admin screens
- Use the integration framework to generate excel spreadsheets using JavaScript
Build a report CSV template
Often the simplest option, and particularly for when the people who download these reports are also front end users. For example, if you have a retail application which has users in stores, and you also have sales reps responsible for groups of stores in their territories, then you will probably want to allow sales reps to login to their own front end dashboard and which makes it easy for them to show off the application to their customers. So it makes sense to integrate analytics into that user experience.
To do that follow these steps
- Create a placeholder file in your website repository which will call the template. This file's name must have the special suffix .dyn.csv, and contain a single line which is the path of the template to invoke. Eg
File name: report1.dyn.csv
Content: /theme/reports/report1.vel - Create the template. This is a plain text template (ie does not have html tags) at the path specified in the placeholder file, which generates rows of comma separated values. See example below.
- Add a link to the placeholder file to your user's dashboard. Optionally, you can allow them to enter parameters such as dates, and pass these are request parameters. Eg
Registrations by Rep - report1.dyn.csv
Example CSV template file:
		#set( $website = $page.find("/"))
		#set($parentOrg = $website.orgData)
		"Registrations by Rep"
		"Territory","Account Group","Store name","Address","City","State","Postcode","Num members"
		#set($childOrgs = $parentOrg.childOrgs())
		#foreach( $t in $childOrgs )
		#set($numReg = 0)
		#foreach( $p in $t.childOrgs() )
		#set($members = $p.primaryMembers())
		"$t.title","$p.fields.brand","$p.title","$p.address","$p.addressLine2","$p.state","$p.postcode","$members.size()"
		#if( $members.size() > 0 )#set($numReg = $numReg + 1)#end
		#end
		,"","","","","","Total # Registered Stores","$numReg"
		,"","","","","","Total # Stores","$t.childOrgs().size()"
		,"","","","","","Total # Registered Stores","$formatter.toPercent($numReg, $t.childOrgs().size(), 2)"
		#end
Customise Existing Reports
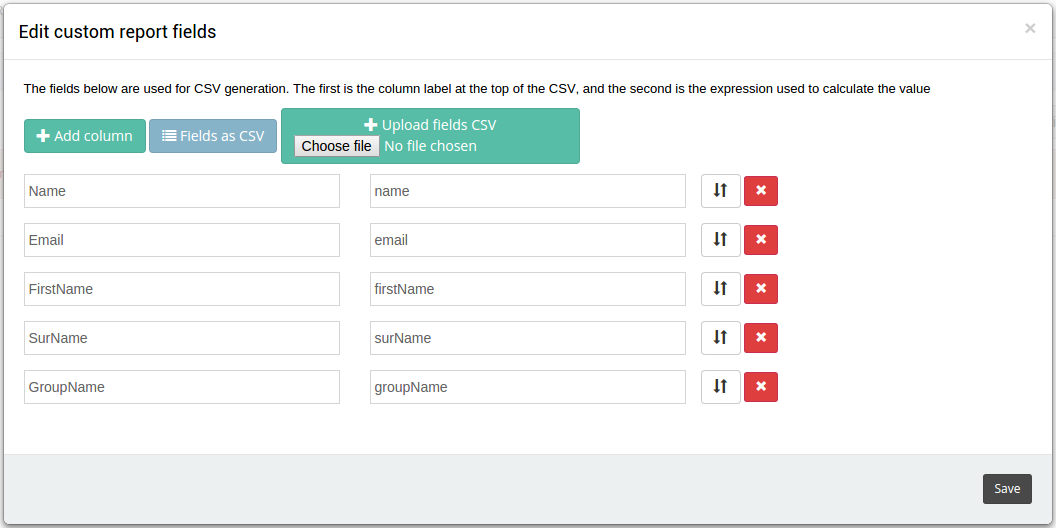
Some reports support field customisation (at the time of writing only the module fields report) which means that you can control what fields are output to the CSV file. Fields can be specified as expressions.
Start by clicking the "Add custom report" button, then select the base report and assign a name:
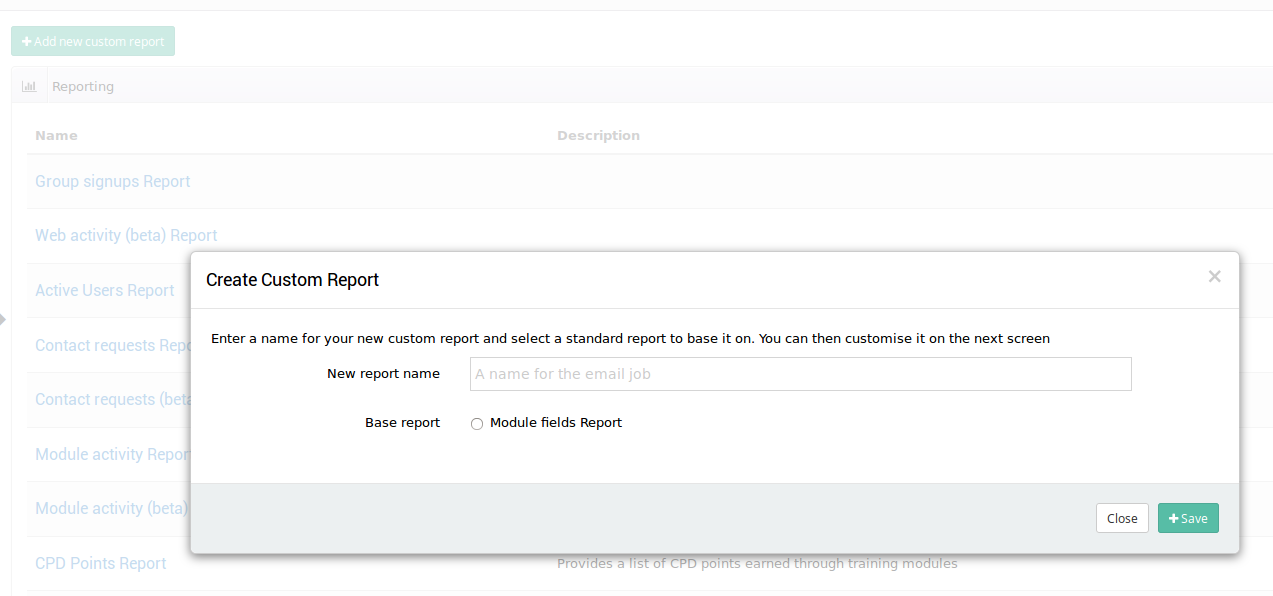
Once you click "Save" you will be taken to the newly created report's page. On the top right hand side you will see a cog, click on it and select Edit Fields. You can now specify what fields should be shown and in what order:
Using Custom Apps to Generate Reports
Custom apps allows you to create your own apps using JavaScript, to learn more about creating custom apps read the how to Creating a KodeJS App or sign up and and complete the App Builder Modules.
This method is similar to creating a CSV template, except we build the csv lines in JavaScript, we also have the ability to view the data first, apply filters, implement search or any other requires there might be.
To do this this follow these steps:
- Create a custom app
- Setup a path controller for the admin page
- Setup a path controller for the CSV file
- Create a JavaScript function to load the results you want and store it in the page.attributes
- Create the admin page to display the results
- Create a JavaScript function to generate the CSV lines and store them in page.attributes
- Create a template html to generate the CSV.
An example of path controllers:
		// Admin Page
		controllerMappings
		  .adminController()
		  .path("/ourCustomReport/")
		  .enabled(true)
		  .addMethod("GET", "populateAuctions")
		  .build();
		// Auctions CSV
		controllerMappings
		  .adminController()
		  .path("/ourCustomReport/auctions-report.csv")
		  .enabled(true)
		  .addMethod("GET", "auctionCsv")
		  .build();
An example of a function that get's all the closed the auctions and puts them into an ArrayList and stores it in page.attributes:
		function populateAuctions(page, params) {
		  // We use a Java ArrayList so the html template can use it
		  var auctionList = formatter.newArrayList();
		  var auctionsFolder = page.find("/auctions");
		  var auctions = auctionsFolder.children.ofType("auction");
		  for (var i = 0; i < auctions.length; i++) {
		    var auction = auctions[i];
		    if (auction.auctionState === "closed") {
		      auctionList.add(auction);
		    }
		  }
		  page.attributes.auctionList = auctionList;
		}
An example of a function that generates the CSV lines:
		function auctionCsv(page, params) {
		  populateAuctionResults(page, params);
		  var csvLines = formatter.newArrayList();
		  // CSV Headers
		  var headers = formatter.newArrayList();
		  headers.add("Autcion Name");
		  headers.add("Auction Title");
		  headers.add("SKU");
		  headers.add("Bid Count");
		  headers.add("Winner");
		  headers.add("Winning Amount");
		  csvLines.add(headers);
		  var auctions = page.attributes.auctionList;
		  for (var i = 0; i < auctions.length; i++) {
		    var auction = auctions[i];
		    var values = buidAuctionLines(auction, page);
		    csvLines.add(values);
		  }
		  page.attributes.csvValues = csvLines;
		  return views.textTemplateView("/theme/apps/mercedes/csv.html", "text/csv");
		}
		function buidAuctionLines(auction, page) {
		  // Get the winning bid
		  var winningBid = auction.auction.winningBid;
		  // Format the date into a readable string
		  var processedDate = formatter.formatDate(auction.auction.auctionProcessedDate, page.organisation.timezone);
		  var values = formatter.newArrayList(); // Create a new Java ArrayList to store the columns
		  values.add(safeString(auction.name)); // Auction Name
		  values.add(safeString(auction.title)); // Auction Name
		  values.add(safeString(auction.sku)); // SKU
		  values.add(safeString(auction.currentBidCount)); // Bid Count
		  // Check to see if there is a winner
		  if (winningBid != null) {
		    values.add(safeString(winningBid.changedBy.formatterName)); // Winners Name or nickname or ID
		    values.add(safeString(winningBid.bidValue)); // Winning Amount
		  }
		  return values;
		}
		// a handle little function that parsers a string safely, and returns '' if null
		function safeString(val) {
		  if (typeof val === "undefined") {
		    return "";
		  }
		  return formatter.format(val);
		}
An example of csv.html template that generates the CSV from the stored ArrayList:
		#foreach($values in $page.attributes.csvValues)
		$formatter.toCsv($values)
		#end
Generate Excel Spreadsheet using integration services
There might be a need to have reports in Excel format instead of CSV, the integration framework provides an easy way to access data and generate an Excel spreadsheet.
When using the integration framework, downloading files is done from the front end website. You can have a separate website dedicated to the integration service if you want to restrict access.
First we need a website, once we have created a website we need to create our integration "pipeline" (see Manage Integration)
Create a single pipeline so it looks like this:
Next we need to create the products.xml and setup the pipeline. This will pull all the products for the organisation and generate the excel rows.
This is an example:
		    Products Sheet

		      SKU
		      Title
		      Base Cost
		      Freight Cost
		      Allow Ordering


		      value.name


		      value.title


		      value.baseCost


		      value.freightCost


		        if(value.canOrderQuantity){
		          return "Yes";
		        }else{
		          return "No";
		        }
To download the file you can add a link to the front end website that looks like this:
Products