Ksync3 from scratch
A folder on your computer, a branch in a Kademi repository, kept the same in both directions. This is everything from a machine with nothing on it to your first edit going live.
~/work/ksync3demo <-> ksync3demo / version1 (a branch on your Kademi account)
What it actually does
You edit files in a normal folder, with whatever editor you like. ksync3 watches that folder and sends each change up to your Kademi account as you save it, and brings down anything other people changed. Nothing is uploaded by hand and there is no zip file anywhere.
The folder remembers which branch it belongs to, in a hidden .ksync folder. That is why almost every command below is one word with nothing after it: after the first day, ksync3 already knows the site, the branch and who you are.
Before you start: what the account needs
Signing in opens your browser and asks you to approve ksync, the same way any other app does. That only works if an administrator has set two things up on the account. If you are not the administrator, send them this section.
1. Install the KOAuth2 app
It is not installed by default, and nothing in the platform serves the sign-in endpoints without it. Find it in the Market Place.

Market Place -> KOAuth2 -> Install in account. It is free.
2. Allow ksync to register itself
Go to People -> OAuth2 Admin Server. On the Settings tab, tick Allow Dynamic Client Registrations and save. It is off by default, and with it off ksync3 cannot sign in at all.

Open the Settings tab, tick Enabled next to Allow Dynamic Client Registrations, then Save Settings. Skipping the save gives you the access denied error described in step 2 below.
3. Give each developer the right roles
Every person who runs ksync3 needs all three of these:
- A membership in this account, in a group that belongs to this account.
- AdminViewer and KOAuth2User on that group, for the whole account.
- One role that lets them edit the files they will sync, from the second table.
An account Administrator already has everything, and needs nothing else.
Always needed
| Role | What it is for | Give it for |
|---|---|---|
| AdminViewer | Logging in to the admin console, which is where ksync3 signs in. It gives nothing else on its own. | The whole account. Given for a repository instead, it does not let them log in. |
| KOAuth2User | Approving ksync in the browser. | The whole account. |
Plus one of these, for the files they sync
| Role | What it is for | Give it for |
|---|---|---|
| App Publisher | Checking out, pulling and pushing apps, libs, themes and recipes. | The whole account, or only the repositories they work on. |
| Website Administrator | Checking out, pulling and pushing websites. | The whole account, or only the websites they work on. |
| Content author | Checking out, pulling and pushing any repository: app, lib, theme, recipe or website. | Only the repositories they work on. For the whole account it opens every repository to them. |
To give a role for only some repositories, pick the repository when you add the role to the group, instead of the account.
The membership has to be in this account. Someone who reaches it only through a membership in a parent account, such as an admin in Rootorg, can open the admin console, but ksync3's sign-in will not work for them. Add them to a group here.
The admin hostname and a website hostname have separate switches. Ticking it under Website Manager does not tick it under People, and ksync3 talks to the hostname in the url you give it.
Things you do not have to configure
- The sign-in redirect comes back to
127.0.0.1on a random port. Loopback addresses are always accepted, on any port, with nothing to add to an allow list. - ksync3 registers itself the first time you sign in, so there is no client id or secret to create by hand. Registered clients appear on the Clients tab.
ksync3 logoutdeletes its own registration, and deleting one there revokes that developer's access. - How long a sign-in lasts is the Refresh Token Expiration Policy on the same Settings tab, 14 days by default. That is how often you will be asked to sign in again.
Step 1: install it
On macOS, Linux or WSL, paste this into a terminal. It needs no admin rights and installs only for you.
curl -fsSL https://raw.githubusercontent.com/Kademi/ksync/master/installers/install.sh | sh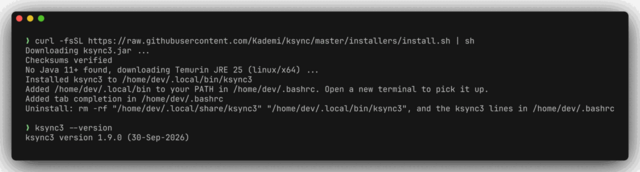
A real install on a machine with no Java on it. ksync3 needs Java 11 or newer; if you have none it fetches its own, so there is nothing else to install. Tab completion is set up at the same time.
On Windows, use PowerShell:
irm https://raw.githubusercontent.com/Kademi/ksync/master/installers/install.ps1 | iexor, if you live in the old Command Prompt:
curl -fsSL https://raw.githubusercontent.com/Kademi/ksync/master/installers/install.cmd -o install.cmd && install.cmd && del install.cmdOpen a new terminal before you carry on. The installer puts ksync3 on your PATH, and a terminal that was already open has not read that yet. Then check it worked with ksync3 --version.
Already have an older ksync3? Run the same command again to upgrade.
Step 2: sign in
Once per account, and again whenever the sign-in expires. Use the address you use for the Kademi admin console.
ksync3 login --url https://yoursite.kademi.coThis opens your browser. If the site does not offer browser sign-in, or you do not finish it, you are asked for a username and password instead. Add --oauth to use the browser only, or --user to skip the browser and use a password.
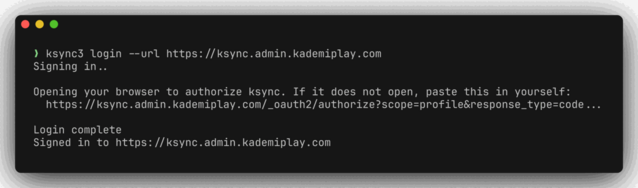
If the browser does not open by itself, paste the url it prints.
Your browser asks you to approve it. This is the account checking that you meant to do this:
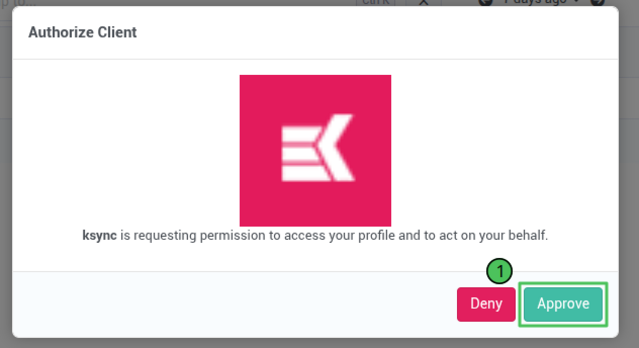
Approve, and the browser lands on a page telling you to go back to your terminal.
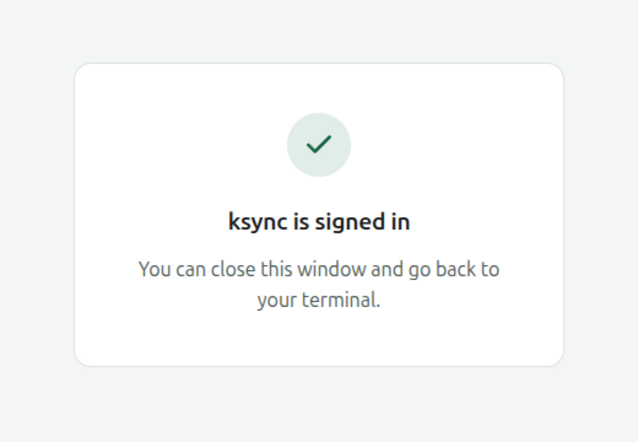
Nothing is stored in the browser. The sign-in goes to ~/.config/ksync/credentials.json, so every checkout of that site is signed in at once.
If the browser refuses with an access denied error, dynamic client registration is still off on the account. That is the checkbox in step 2 of the administrator checklist above, not something you can fix from the terminal.
Step 3: get the files
Make an empty folder, go into it, and check out the branch you want to work on.
mkdir ksync3demo && cd ksync3demo
ksync3 checkout --url https://yoursite.kademi.co/repositories/ksync3demo/version1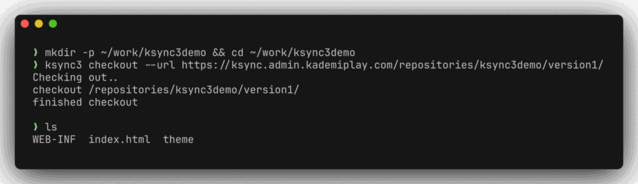
Every file in the branch lands in the folder, and the branch is recorded in .ksync. From here on, commands run in this folder need no url at all.
If the folder already holds the files, from a git clone for example, use ksync3 init --url ... instead. It records the branch and signs you in if needed, but downloads nothing and leaves what is there alone.
Use the/repositories/address, not the one in your browser's address bar. The admin console shows a website at/websites/name/version1/, which is the page about it rather than the branch itself. ksync3 will tell you so:
... is not a repository branch: it answered with a page rather than a
version. A checkout url looks like
https://yoursite.kademi.co/repositories/<repository>/<version>/
Leave the version off the end to follow the repository instead of pinning to one version, so you always sync against its latest.
Step 4: work
Start a sync and leave it running in its own terminal window while you work.
ksync3 sync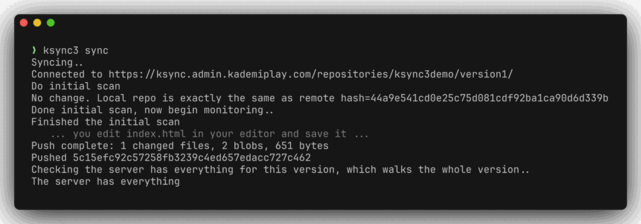
Save a file in your editor and it goes up. Change something on the site and it comes down. A ksync icon in your status bar shows how it is going; add --notray if you would rather not have it.
If the server goes away for a moment, sync keeps your changes and tries again by itself, so you can keep working. If it cannot start at all, because the url is wrong or the server cannot be reached, it tells you why and stops.
Stop it with q then Enter, Ctrl+C, or Quit from the status icon, when you are done for the day. On Windows Ctrl+C does not always get through, which is what the q is for.
If you would rather move things one batch at a time, the two halves are separate commands:
| Command | What it does |
|---|---|
ksync3 push |
Send your changes up. If someone else has pushed since your last sync, it stops and asks you to pull first, so it never overwrites their work. |
ksync3 pull |
Bring remote changes down into your folder. A file changed on both sides is a conflict, and you are asked which to keep. |
ksync3 sync |
Watch, and do both continuously as things change. |
If you answer no to a conflict, or there is nobody to ask, pull keeps your file and push stays blocked until a later pull settles it. --localwins on any of the three makes your folder the truth: it keeps your file on every conflict and overwrites the remote without asking.
Working from source control
When the code lives in git, git is the truth and ksync3 is only how it reaches the account. Starting on an app or lib you already have a clone of:
- Set the folder up with
init, notcheckout. Give it the repository url with no version on the end, so it follows the latest version. It signs you in if it needs to, and downloads nothing, so there is nothing to revert. - Run sync with
--localwins, every time. Your files then overwrite whatever is on the server instead of raising conflicts. The flag is not remembered, so it goes on each run. - Restart sync after the live version changes, for example after Apply Updates. Sync picks the latest version when it starts and keeps to it, so a sync left running carries on writing to a version the account no longer uses.
cd ~/src/mylib
ksync3 init --url https://yoursite.kademi.co/repositories/mylib
ksync3 sync --localwins
Leaving files out
Build output, node_modules, editor junk: things that live in your folder but have no business on the site. The rules are gitignore's, so anything you know from .gitignore works here, including putting a file back with !.
Rules the whole team should share go in a .ksyncignore file in the checkout, which is synced like any other file. Rules that are only about your machine go in ~/.config/ksync/ignore.
When a file mysteriously is not syncing, ask which rule is responsible rather than guessing:
ksync3 check-ignore theme/dist/bundle.js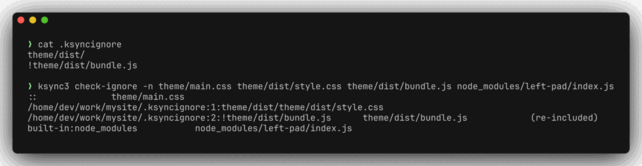
Each answer names the file and the line number that decided it. :: means no rule matched at all, and built-in means one of the defaults ksync3 ships with, which you can override in your own file.
In scripts and CI
A build server has no browser to sign in with. Create an API key on the API Keys tab of the profile it should act as, and give it to ksync3 in the KSYNC_TOKEN environment variable, or with --token. It needs no login and is never stored.
KSYNC_TOKEN=ko2_ak_... ksync3 push --localwins --url https://yoursite.kademi.co/repositories/ksync3demo/version1Every command exits with 1 when it did not do what it was asked, so a script can stop there without reading the output.
When something is wrong
- A file will not upload. Run
ksync3 verify. It asks the server which files it has no content for, uploads any it can from your folder, and lists what is still missing. - You want to sign in as somebody else.
ksync3 logoutsigns you out of this checkout's site and revokes the login on the server, or add--urlfor any other one. - You forget the options. Every command explains itself with
--help, and pressing Tab completes command and option names for you.
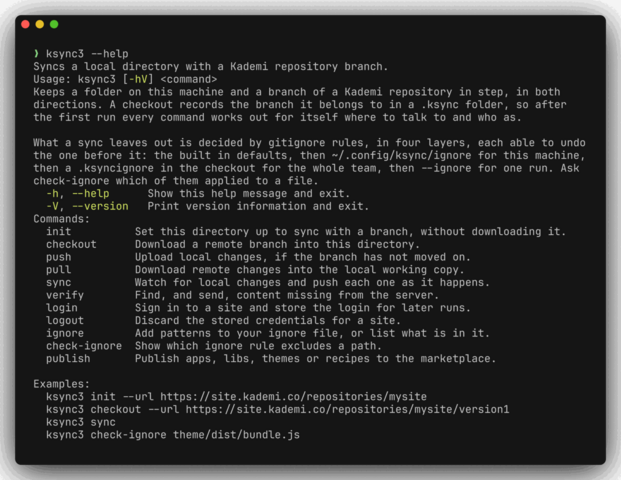
Eleven commands, and that is all of them.
Written against ksync3 1.9.0. Every picture on this page is real: the terminal output is from that version, and the screens are a live Kademi account being set up from nothing.